4,9/5 | Based on more than 21.000 Reviews

Radish seed germination seeds organic

Bio

€5,20

  • Germination seeds weckpot method
  • Also, reuse your Pit&Pit pots usefully!
  • Organic germination seeds
  • Growing your own healthy sprouts
  • pre-soaking : 6 hours
  • Growing time : approx 3-5 days
  • Super-healthy sprouts
  • Life in the house!

    Germinate seeds easily yourself, it fun to do and mega healthy. Sprouts are sprouts of all kinds of seeds. With just water and warmth you let the seeds come to new life. The beautiful sprouts that appear are by far the most vital stage of any plant. They are no longer seeds, but they are not yet plants either.

    For the explosion of life, the sprouts still get their necessary nutrition entirely from the seed - not from soil - and that is converted for humans into valuable nutrients that are very easily absorbed and digested.

    Organic sprout seeds without additives

    For the production of our certified organic sprouts, we use only seeds of organic origin. So it without the use of chemical pesticides, fertilizers and artificial additives, and without GMOs.

    With almost all ready-to-eat sprouts in the supermarket, additives are added to the growing water and then additionally treated with disinfectant powder. With our organic sprouting seeds, however, you grow the purest and freshest, crispiest sprouts and microgreens possible.

    Radish sprouts - pungent flavor and a beautiful green-yellow color

    With radish seeds you grow a sprout vegetable that is suitable in raw salad, and also visually gives a big kick to all your dishes.

    Radish sprout seeds using the grow pot method - your Pit&Pit pots are extremely suitable!

    Broadly speaking, there are 2 methods for home germination. Each seed type has its specific method. Radish germination seeds are grown at home using the seed pot method. You grow them in a glass weck jar, or better yet, reuse your large size Pit&Pit jars.

    What you need:

    Our seedling starter kit contains all the supplies you need, but you can also just use the parts, or what you already have lying around at home

    • A 1.5 liter glass jar

    • EXCELLENT IDEA: Do you still have the largest size of PIT&PIT jars? They are very suitable because of their size and their wide collar to be reused as culture pots for self-germination.

    • a mosquito net

    • a sturdy elastic

    The grow pot method seems a little complicated at first glance, but is actually very simple. There are 2 phases:

    • The soaking phase: the radish seeds are soaked in lukewarm water for 6 hours

    • The germination phase: the seeds are briefly rinsed 2-3 times daily and leaked out in between.

    • Radish sprouts are ready after only 4-5 days.

    1. Put two tablespoons of al radish germination seeds in a the culture jar, and add plenty of lukewarm/hot water. Any glass jar is suitable of at least 1.5 L if the neck does not constrict much. Your large format Pit&Pit jars are extremely suitable!

    2. Attach a screen mesh with a sturdy elastic over the neck of the jar. The idea is that through the mesh you can pour off water without the germs falling out of the jar, and on the other hand add water.

    3. Allow the radish seeds to soak for 6 hours and then pour off the water (through the gauze). Rinse the seeds, and pour away the water again, the caking water remains on the seeds.

    4. At room temperature, put the pot away upside down in a colander, at about a 45° angle, including a tray or plate rack so excess water can drain away. It is important that all the adhering water can drain away. The water that sticks to the sprouts is enough to keep the germination process going. It is also important that the seed/sprouts do not cover the entire gauze. For a good result it is very important that there is sufficient air supply. Therefore, after each rinse, spread the seed/germs over the length of the pot. Do not place the pot with seed/germs on heaters, especially not in full sun!

    5. Rinse the seed/germs 2 to 3 times per day for 3 days. Put the pot away upside down, so that the water that has caught on can drip off.

    6. Let the sprouts in the pot (upside down) grow dry for ± 24 hours after the last rinse if necessary, before consuming them and/or putting them in the refrigerator.

    you have grown your own radish sprouts!

    Ingredients

    Organic radish germination seeds

    Allergens

    This product contains no allergens.

    This product is packaged and/or stored in a facility that also processes products containing nuts, peanuts, mustard, celery, gluten, sesame, soy and sulphite. Despite all precautions, this product may contain traces of these allergens.

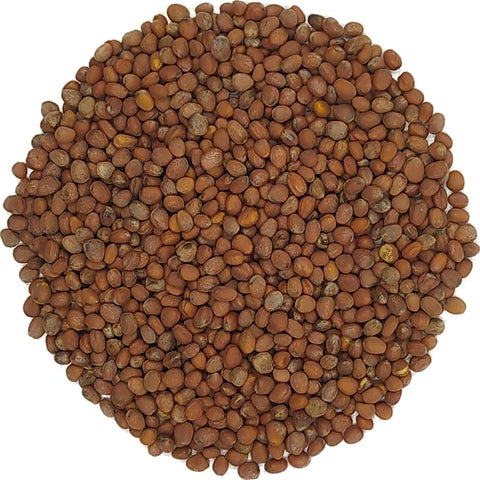
Radish seed germination seeds organic

140 gr / 1

€5,20

Related products

  • Life in the house!

    Germinate seeds easily yourself, it fun to do and mega healthy. Sprouts are sprouts of all kinds of seeds. With just water and warmth you let the seeds come to new life. The beautiful sprouts that appear are by far the most vital stage of any plant. They are no longer seeds, but they are not yet plants either.

    For the explosion of life, the sprouts still get their necessary nutrition entirely from the seed - not from soil - and that is converted for humans into valuable nutrients that are very easily absorbed and digested.

    Organic sprout seeds without additives

    For the production of our certified organic sprouts, we use only seeds of organic origin. So it without the use of chemical pesticides, fertilizers and artificial additives, and without GMOs.

    With almost all ready-to-eat sprouts in the supermarket, additives are added to the growing water and then additionally treated with disinfectant powder. With our organic sprouting seeds, however, you grow the purest and freshest, crispiest sprouts and microgreens possible.

    Radish sprouts - pungent flavor and a beautiful green-yellow color

    With radish seeds you grow a sprout vegetable that is suitable in raw salad, and also visually gives a big kick to all your dishes.

    Radish sprout seeds using the grow pot method - your Pit&Pit pots are extremely suitable!

    Broadly speaking, there are 2 methods for home germination. Each seed type has its specific method. Radish germination seeds are grown at home using the seed pot method. You grow them in a glass weck jar, or better yet, reuse your large size Pit&Pit jars.

    What you need:

    Our seedling starter kit contains all the supplies you need, but you can also just use the parts, or what you already have lying around at home

    • A 1.5 liter glass jar

    • EXCELLENT IDEA: Do you still have the largest size of PIT&PIT jars? They are very suitable because of their size and their wide collar to be reused as culture pots for self-germination.

    • a mosquito net

    • a sturdy elastic

    The grow pot method seems a little complicated at first glance, but is actually very simple. There are 2 phases:

    • The soaking phase: the radish seeds are soaked in lukewarm water for 6 hours

    • The germination phase: the seeds are briefly rinsed 2-3 times daily and leaked out in between.

    • Radish sprouts are ready after only 4-5 days.

    1. Put two tablespoons of al radish germination seeds in a the culture jar, and add plenty of lukewarm/hot water. Any glass jar is suitable of at least 1.5 L if the neck does not constrict much. Your large format Pit&Pit jars are extremely suitable!

    2. Attach a screen mesh with a sturdy elastic over the neck of the jar. The idea is that through the mesh you can pour off water without the germs falling out of the jar, and on the other hand add water.

    3. Allow the radish seeds to soak for 6 hours and then pour off the water (through the gauze). Rinse the seeds, and pour away the water again, the caking water remains on the seeds.

    4. At room temperature, put the pot away upside down in a colander, at about a 45° angle, including a tray or plate rack so excess water can drain away. It is important that all the adhering water can drain away. The water that sticks to the sprouts is enough to keep the germination process going. It is also important that the seed/sprouts do not cover the entire gauze. For a good result it is very important that there is sufficient air supply. Therefore, after each rinse, spread the seed/germs over the length of the pot. Do not place the pot with seed/germs on heaters, especially not in full sun!

    5. Rinse the seed/germs 2 to 3 times per day for 3 days. Put the pot away upside down, so that the water that has caught on can drip off.

    6. Let the sprouts in the pot (upside down) grow dry for ± 24 hours after the last rinse if necessary, before consuming them and/or putting them in the refrigerator.

    you have grown your own radish sprouts!

    Ingredients

    Organic radish germination seeds

    Allergens

    This product contains no allergens.

    This product is packaged and/or stored in a facility that also processes products containing nuts, peanuts, mustard, celery, gluten, sesame, soy and sulphite. Despite all precautions, this product may contain traces of these allergens.

Related products